A slice of warm swirled cinnamon raisin bread slathered with butter is the perfect addition to your breakfast! The ultimate comfort food!

This swirled cinnamon raisin bread is a favorite in our family, especially for breakfast! It's absolutely delicious toasted and generously buttered! I also love pulling back the layers while eating it!
It has plump, juicy raisins and a cinnamon sugar filling swirling inside! The dough is slightly sweet and mildly spiced with a soft, pillowy texture!
My Cinnamon Rolls From Scratch and my Tsoureki Greek Easter Bread are a few other recipes you might like to try!
Jump to:
WHY YOU'LL LOVE THIS RECIPE:
- It's really versatile and straightforward. I'll guide you through each step with a picture tutorial.
- It can be made completely by hand or with a stand mixer. So if you like kneading by hand, you can easily do so. If you want the stand mixer to do all the work, you can do that, too! I've made it using both methods.
- It may take a while to make this raisin bread, but it's SO simple and totally worth the extra effort.
TWO WAYS TO MAKE IT
I love making this amazing swirled cinnamon raisin bread 2 different ways, with 2 different versions of the filling!
One is made with butter and the other is made with light vegetable oil. I also use granulated sugar for one filling and dark brown sugar for the other.
Each filling creates a slightly different flavor and texture! The one with butter is lighter and not as sweet. The one with the vegetable oil is a bit denser and sweeter and creates a luscious, moist center that's reminiscent of my cinnamon rolls. Both fillings are provided in the recipe card below.
FREQUENTLY ASKED QUESTIONS
With this recipe, you can either make 1 large loaf or 2 smaller loaves. I usually make 2 smaller loaves so that I can store one in the freezer.
To keep the bread soft, you need to store it airtight. I always store it in plastic wrap. Then I put it in the refrigerator or the freezer.
Yes! You can either wrap the entire loaf in plastic wrap and place it in a freezer bag or freezer-safe container, or slice it and individually wrap each slice. You can put each frozen slice directly in the toaster, or you can thaw it overnight in the refrigerator and then put it in the toaster.
A NOTE ABOUT PROOFING YEAST
You need to warm the milk to a temperature between 105° F - 115° F (40°C - 46°C). To test if the temperature is right without using a thermometer, the milk should feel comfortably warm on your wrist, but not hot. If it's too hot, it'll kill the yeast! If you kill the yeast, it won't proof and the dough will not rise.
Once you get the right temperature, add the yeast and a teaspoon of sugar and stir it. The sugar acts like food for the yeast, which will activate it. Then let it sit for about 10 minutes. You'll know it's ready when the mixture becomes foamy and bubbly (see step 1 - the picture on the right in the tutorial below).
If after 10 minutes your mixture doesn't get foamy, it means that it hasn't proofed. It could be because the yeast has expired. In any case, if the yeast hasn't proofed, you'll have to start all over again.
HOW TO MAKE SWIRLED CINNAMON RAISIN BREAD


For this picture tutorial, I'll show you how to make this recipe by hand. Instructions for using a stand mixer will be included in the printed recipe card.
STEP 1
First, you need to proof the yeast. Warm the milk to a temperature between 105° F -115° F (40°C - 46°C). If you don't have a thermometer, don't worry, you can test a tiny bit on your wrist. It should feel comfortably warm, but not hot. Then stir in the yeast and a teaspoon of sugar. Let it proof for about 10 minutes until it's foamy.
STEP 2
Whisk together the egg, butter, sugar, salt and the proofed yeast mixture.
STEP 3
Now you start adding the flour, a little at a time, and stir.
STEP 4
Add the raisins and mix.
STEP 5
Start kneading the dough on a floured surface for 10 minutes, adding extra flour if needed until the dough is pliable.
STEP 6
Grease a bowl with oil, add the dough and coat it with some oil, too.
STEP 7
Cover the dough and let it rise until it's doubled in size (1-2 hours, depending on how warm your environment is).
STEP 8
Roll out the dough into a rectangle, brush it with the melted butter and add the filling on top.
STEP 9
Roll it up, pinch the ends and then tuck them under. This will help the loaf hold its shape.
STEP 10
Then you place it in your pan, cover it again and let it rise again for 30 minutes.
After it's risen a second time, you uncover it and bake it.

TOP TIP TO HELP THE DOUGH RISE FASTER
Before starting, turn the oven on for a few minutes (at 140°F / 60°C ) and then turn it off and wait a few minutes before adding the dough. This creates a nice, warm environment, allowing the dough to rise faster. Keep in mind that rising times will depend on a lot of factors, like the type of flour you use and how warm and humid your environment is.

MAKE-AHEAD OPTIONS
This swirled cinnamon raisin bread can be made ahead of time if you want it freshly-baked for breakfast!
Just prepare the dough and place it in a lightly greased bowl. Then cover it loosely with plastic wrap and refrigerate it overnight, but don't put it into the pan(s) because it will rise too much and overflow.
In the morning, roll out the dough, add the filling and shape. Then place it in the pan(s) and let it sit at room temperature for about 15 minutes before baking.
Allowing the dough to rise in the fridge overnight really allows all the flavors to develop!
VARIATIONS
- Soak a few raisins in cognac, rum, bourbon, or whisky and then drain them before kneading them into the dough. Delicious!
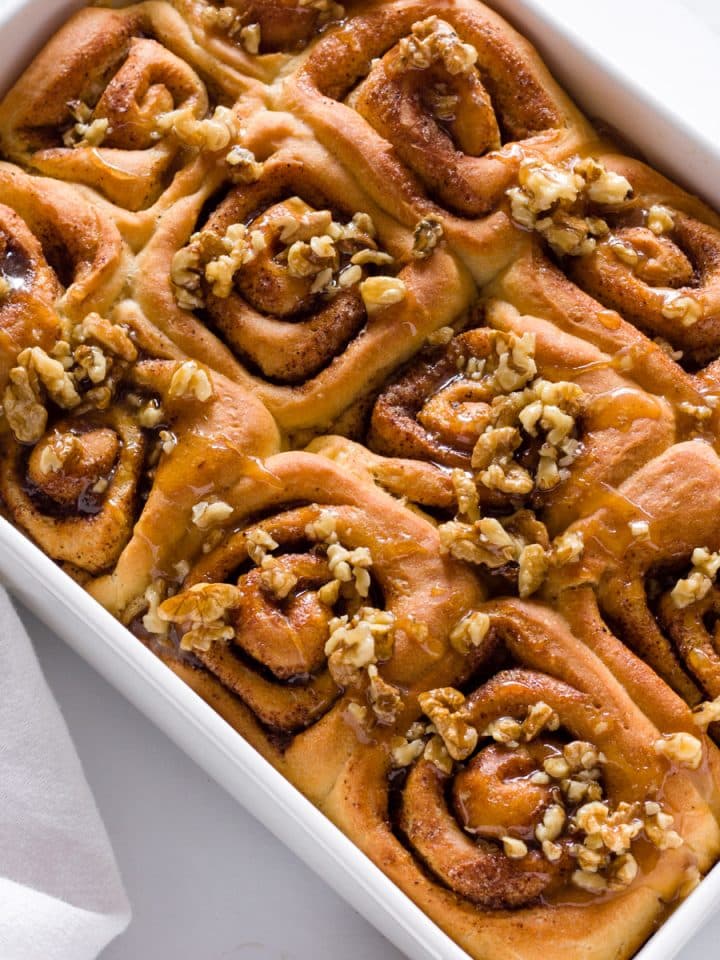
- Add some chopped walnuts or pecans to the filling for a little texture.
TIPS FOR SUCCESS
- Measure the flour properly. If your dough is a bit sticky or too wet, add some flour, but only a tablespoon at a time, until it's pliable or no longer sticks to the sides of the bowl in the stand mixer.
- Make sure you proof the yeast properly. The yeast mixture needs to be foamy; that means it's alive and active (see picture tutorial above).
- Kneading the raisins into the dough helps them stick to the bread better rather than just putting them in the filling.
- I like to oil the bowl and the dough when preparing it for the first rise. Whenever I do this, I don't need to flour my work surface or the rolling pin! The dough does NOT stick at all! This is important because adding too much flour can make the bread crumbly and dry, rather than soft and fluffy!
- The thinner you roll out the dough, the more ooey-gooey, cinnamony-crazy swirls you'll have inside when you roll it up!
- Lining the pan(s) with overlapping parchment paper makes cleanup a lot easier because you just lift the bread out of the pan when it's done. Of course, instead of using parchment paper, you could just lightly grease the pan(s) before adding the dough. Both work fine.
- Brushing the top with butter as soon as it comes out of the oven makes the crust softer.

HOW TO ENJOY SWIRLED CINNAMON RAISIN BREAD
- Slice it: Enjoy it plain, as it is, or add some cream cheese. You could also drizzle some honey or maple syrup over it.
- Freeze it: I always freeze individual slices. Whenever I want a slice, I just take it out of the freezer, put it in the toaster, and then butter it.
- A Perfect breakfast: Serve it warm, fresh out of the oven! It is so good with coffee!!!
- Leftovers: If you have any leftovers, just make French toast with it. OMG!!! It's DIVINE!
MORE BREAKFAST RECIPES!


Let me know how this Easy Swirled Cinnamon Raisin Bread turns out for you in the comments below! I'd love to hear from you!
Recipe

Easy Swirled Cinnamon Raisin Bread (2 Ways)
Equipment
- one or two 9 x 5 inch (23 X 13 cm) bread loaf pans
Ingredients
For the dough
- 1 cup (250 ml) milk
- 2 ¼ teaspoons active dry yeast (1 standard packet)
- 1 egg, lightly beaten
- ¼ cup (56 g / 2 oz) unsalted butter, melted and cooled
- ½ cup (100 g) granulated sugar
- ½ teaspoon salt
- 3 ½ cups (444 g / 15.7 oz) all-purpose flour (plus up to ½ cup extra for kneading)
- 1 cup raisins (about 150 g / 5.3 oz)
- 1-2 tablespoons light vegetable oil
- 4 tablespoons unsalted butter (to spread on baked loaves)
For the cinnamon sugar filling* (OR See the NOTE below for a sweeter, denser & really moist filling)
- 2 tablespoons melted butter
- 1 ½ tablespoons ground cinnamon
- 1 ½ tablespoons granulated sugar
- a pinch of ground nutmeg
Note:
For best results, please read through the full post before beginning the recipe.
Instructions
Prep the pan(s)
- Line the pan(s) with overlapping parchment paper. Alternatively, generously grease the pan(s) with vegetable oil. Set aside.
Proof the yeast
- Warm the milk to a temperature between 105° F -115° F (40°C - 46°C). It should feel comfortably warm on your wrist, but not hot. Stir in the yeast and a teaspoon of sugar. Let it proof for about 10 minutes until it's foamy.
Make the dough
- In a large bowl, or in the bowl of a stand mixer, whisk together the beaten egg, melted butter, sugar, and salt. Add the proofed yeast mixture and mix.
- Add the flour, a little at a time, and stir with a wooden spoon. If using a stand mixer, use the dough hook and mix on medium speed.
- Add the raisins and mix.
Knead the dough
- Knead the dough for 10 minutes. You can either do this by hand on a floured surface or with the stand mixer (using the dough hook) on medium speed. Add enough flour, a tablespoon at a time, until the dough is pliable or doesn't stick to the sides of the bowl.
Let the dough rise
- Lightly grease a bowl with oil. Add the dough and coat it with some oil, too. Cover with plastic wrap and let it rise until it's doubled in size (1-2 hours).
Roll out the dough
- If you want 2 loaves, divide the dough in half. Then roll it out into a rectangle (about 9 X 20 inches / 23 X 50 cm).
Add the filling* & roll up the dough
- Brush the dough with the melted butter. Then sprinkle the surface with the sugar and spices. Roll up the dough, pinch the ends, and tuck them under.
Let the dough rise a 2nd time & then bake
- Place the dough seam side down into the prepared bread pan(s). Cover with plastic wrap and then a clean towel and let it rise again for 30 minutes.
- About 15 minutes before the end of the rising time, preheat the oven to 375 °F / 190 °C.
- Uncover the dough and bake it for 35-45 minutes or until it's golden brown on the top.
- Remove the bread from the oven and immediately spread the top with the butter. Allow it to cool in the pan(s) for about 10 minutes.
- Remove the bread from the pan(s) and allow it to cool completely on a wire rack before slicing it.
- Store covered at room temperature for up to 4 days or in the refrigerator for up to a week. The baked loaves can be frozen for up to 2 months.
- Enjoy!
Notes
Sharon
High marks for this fantastic bread! I loved how easy to make and assemble (kitchen aid for me and my tendonitis) and it really is non stick! I used the filling paste and it made such a lovely swirl! Second loaf now on the rise so my family is super excited! Thanks again for a great recipe!
Voula
Awww, Sharon, thank you so much for your feedback! I'm so happy it was a success! ☺️