Who can possibly resist a luscious slice of cheesecake? This tall, crack-free, New York-style cheesecake is ultra rich and creamy! It's sure to be a showstopper at any party or get-together.

I've made lots of cheesecakes, but, there is nothing quite like New York-style cheesecake!
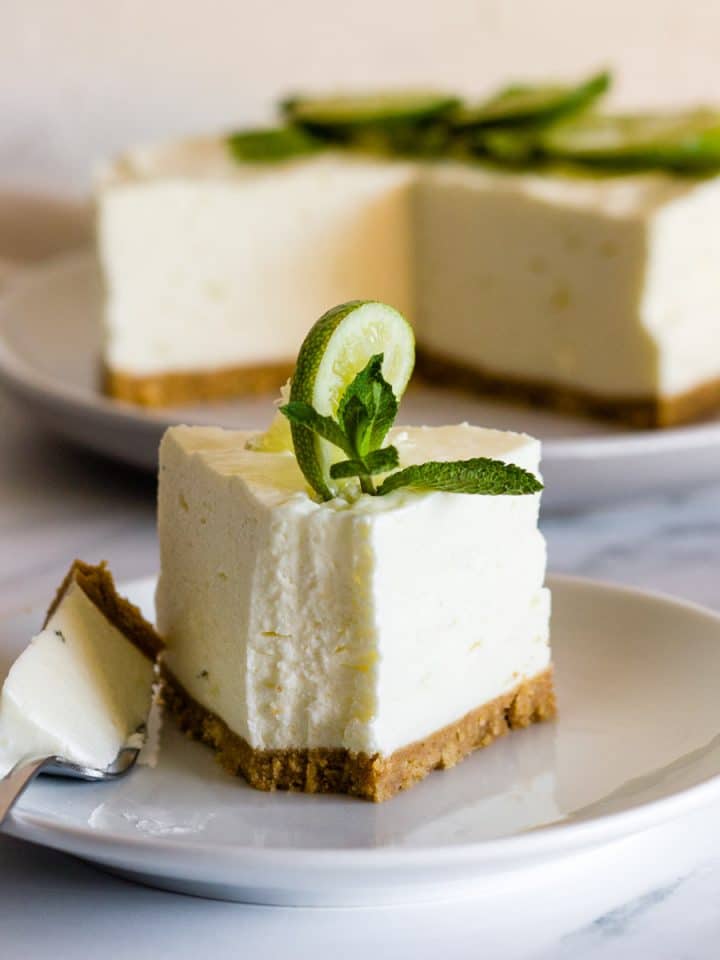
It's dense, with a silky smooth, velvety texture - the way cheesecake is meant to be!
Love cheesecake? Try my easy no bake Biscoff cheesecake or my No Bake Pumpkin Cheesecake Bars!
Jump to:
What is New York-style cheesecake?
What sets New York-style cheesecake apart from the rest is that it is baked, resulting in a distinctive firm and mouthwatering creamy filling.
If you've never made New York-style cheesecake before, you have to give it a try - you won't be disappointed!
There are two ways to bake a New York-style cheesecake: with or without a water bath.
What is a water bath?
When baking cheesecakes, a water bath refers to baking it in a pan which is put inside a larger pan that is filled with hot water. So the cheesecake is surrounded by the hot water as it bakes.
The benefits of using a water bath
The hot water surrounding the pan gently bakes the cheesecake by creating a moist environment in the oven. This is crucial so the cheesecake doesn't dry out and become rubbery. Yuck!
Another reason why I love this method is because it prevents the cheesecake from cracking and sinking.
So, let's say you want to serve the cheesecake without any toppings. If it's full of cracks or the center has sunk, it won't look very impressive. Take a look at the picture below. Not a single crack!

What you'll need
Cookie crumbs: I always use Digestive biscuits because graham cracker crumbs are not that easy to find in Europe. Of course, you could use graham cracker crumbs, instead.
Butter: I use unsalted butter.
Spices: I use a combination of cinnamon and ground nutmeg in the crust, but this is totally optional.
Cream Cheese: I use full-fat cream cheese. Low-fat will not offer the same results!
Sugar: I use regular, granulated sugar.
Flour: I use all-purpose flour.
Eggs: I use organic eggs.
Salt: Just a pinch for flavor.
Vanilla: I use pure vanilla extract.
Juice: I use some lemon juice.
Greek yogurt: I always use full-fat Greek yogurt. As with the cream cheese, low-fat yogurt will not offer the same results!
I have made this cheesecake before with sour cream and it was delicious, but I found that Greek yogurt adds an incredible light tanginess that balances out the overall sweetness.
How to make New York-style cheesecake
This cheesecake is not a quick recipe, it's more of a make-ahead dessert because it needs to be refrigerated overnight before serving.
For this recipe, you'll need a ten inch (26 cm) springform pan. A springform pan has a removable bottom, which makes it easier to remove the cheesecake without it falling apart.
Butter the pan and line the bottom and the sides with parchment paper.
Then, make the crust.

Then make the filling and prepare the water bath.

Then bake. Turn off the oven and allow the cheesecake to cool inside with door slightly ajar for one hour. I like to use the handle of a wooden spoon to keep the oven door open. Then take it out of the oven and let it cool completely at room temperature for 2-3 more hours.
Then refrigerate overnight before serving.
Tips for success
- Use 2-3 layers of aluminum foil (preferably heavy duty) around the pan to keep it from taking in any water while baking.
- Make sure your ingredients are at room temperature before you begin. That way, you avoid overmixing the filling.
- Don't overmix the filling because it creates a lot of air, which could cause the cheesecake to puff up and collapse while baking, almost like a soufflé.
- Don't use cold water for your water bath - always use boiling-hot water.
- Before pouring the filling over the crust, gently tap the bowl on the counter to knock out any air bubbles.
- DO NOT BE TEMPTED TO OPEN THE OVEN DOOR WHILE BAKING! That would affect the temperature inside the oven which would cause the cheesecake to bake unevenly.
- Let the cheesecake cool down gradually, not too fast. This will prevent cracks.
- When the cheesecake has completely cooled, cover it loosely with plastic wrap and refrigerate overnight. If you seal it tightly with plastic wrap any condensation that forms in the fridge might drip onto your cheesecake and make it soggy!
- As difficult as it to wait, always chill the cheesecake overnight before serving! It tastes so much better after being in the fridge overnight!
- To slice, dip a straight edge knife into a glass of hot water and wipe it dry before each cut. This will give you perfect slices every time!
Cheesecake topping ideas
Feel free to top your cheesecake with whatever you like! Here are a few ideas I've tried:
- Strawberry sauce or jam. This is an all-time classic cheesecake topping! My strawberry jam recipe is what I used in the picture below. It's not too thick, but it's not runny, either. ABSOLUTELY DIVINE WITH THIS CHEESECAKE!
- Whipped cream with some cinnamon sprinkled on top. This delicious combination is really light and airy!
- Chocolate sauce or syrup. You can never go wrong with chocolate! My easy homemade chocolate syrup recipe is AMAZING and it pairs so well with cheesecake!
- Salted Caramel sauce.
- Fresh fruit.

Are you drooling yet???!!???
I really hope you enjoy this Creamy New York-style Cheesecake!
~Voula
Let me know how this Creamy New York-style Cheesecake turns out for you in the comments below! I'd love to hear from you!
More cheesecake recipes to try!


Recipe

Creamy New York-Style Cheesecake
Equipment
- a ten inch (26 cm) springform pan
Ingredients
For the crust
- 400 g crushed Digestive biscuits or about 3⅓ cups graham cracker crumbs (about 27 full sheet graham crackers)
- 4 tablespoons sugar
- 200 g (7 oz) unsalted butter, melted
- a pinch of ground nutmeg (optional)
- a pinch of ground cinnamon (optional)
For the filling
- 1 ½ cups (300 g / 10.6 oz) sugar
- 4 tablespoons all-purpose flour
- 4 eggs
- 1 kilo (2.2 pounds / 36 oz) full-fat cream cheese, at room temperature
- a pinch of salt
- 1 teaspoon vanilla
- 1 container (200 g / 7 oz) full-fat Greek yogurt, at room temperature
- 2 tablespoons lemon juice, at room temperature
Note:
For best results, please read through the full post before beginning the recipe.
Instructions
Preheat the oven
- Preheat the oven to 350°F/ 180°C.
Prep the pan
- Butter the pan and line the bottom and the sides with parchment paper. Set aside.
Make the crust
- Mix the cookie crumbs, sugar, spices, and melted butter together. You can do this in the food processor or in a bowl using a spoon.
- Spoon the crumb mixture into the prepared springform pan.
- Starting in the center, use a straight-sided glass to gently press the crumb mixture over the base and up the sides of the pan.
- Use the glass to even out the thickness and edges of the crust. Set the pan aside.
Make the filling
- In a small bowl, mix the flour and the sugar together. Set aside.
- In another small bowl, lightly beat the eggs. Set aside.
- In a large mixing bowl, beat the cream cheese until smooth. Scrape the bowl often.
- Add the salt, the flour mixture, the eggs, vanilla, yogurt, and the lemon juice. Beat on until well combined. I start off on low speed. Do not overmix.
- Gently tap the bowl over the counter a few times to remove any air bubbles. If you still see a few air bubbles, pop them with a toothpick.
- Wrap the springform pan with 2-3 layers of aluminum foil so that no water leaks into the cheesecake (see pictures in the post).
- Pour the filling over the prepared crust.
- Smooth out the top with the back of a spoon.
- Place the pan into a larger pan, like a roasting pan.
- Pour boiling-hot water in the larger pan, about 2 inches (5 cm) deep, or until it reaches halfway up the springform pan.
- Place the pan in the lower or middle rack of the oven.
- Bake for 45 minutes. Then lower the temperature to 325 °F / 160°C and bake for another 45 minutes.
- DO NOT OPEN THE OVEN DOOR AT ALL.
- Turn off the oven and allow the cheesecake to cool inside with door slightly ajar for one hour. I like to use the handle of a wooden spoon to keep the oven door open.
- Take the cheesecake out of the oven and let it cool completely at room temperature for 2-3 more hours.
- Cover it loosely with plastic wrap and refrigerate overnight before serving.
Transfer the cheesecake to a plate or serving platter
- Gently release the ring and remove the parchment paper from the sides and the bottom. It should be easy to lift the entire cheesecake off the bottom parchment paper.
- Transfer the cheesecake to a plate or serving platter.
- To slice, dip a straight edge knife into a glass of hot water and wipe it dry before each cut.
- Enjoy as is or with your favorite toppings!
- Store in the refrigerator for up to 5 days.
Notes
I have a detailed picture tutorial in my post to help you out with each step of the recipe as well as lots of tips to ensure success. Baking Measurements
I have used weight measurements for all the recipes on this website. Even though I have also included American volume measurements for convenience, I highly recommend using a digital kitchen scale to weigh all ingredients for the most accurate measurements. Digital kitchen scales are more precise than cups, which is so important in baking, and they give the most accurate, consistent results. Happy baking! © Pastry Wishes
the viceman
OK great now I can't sleep....Need this in my mouth now....
Voula
Haha!
Elisa Metsikas
Hello! Just wondering if you think this recipe would work if I halved the mixture? Thank you!
Voula
Hello, Elisa! I'm not sure if it would come out OK, because it would be too thin, rather than nice and tall, especially for a 10-inch pan. I think if you halve the ingredients and use a 6-inch pan, it should work! Let me know how it goes!
Karen
Great recipe. Just a note: The eggs weren't added in the directions when combining the ingredients.
Voula
Hi, Karen! Thanks so much for pointing that out! I fixed it! So glad you liked the recipe!