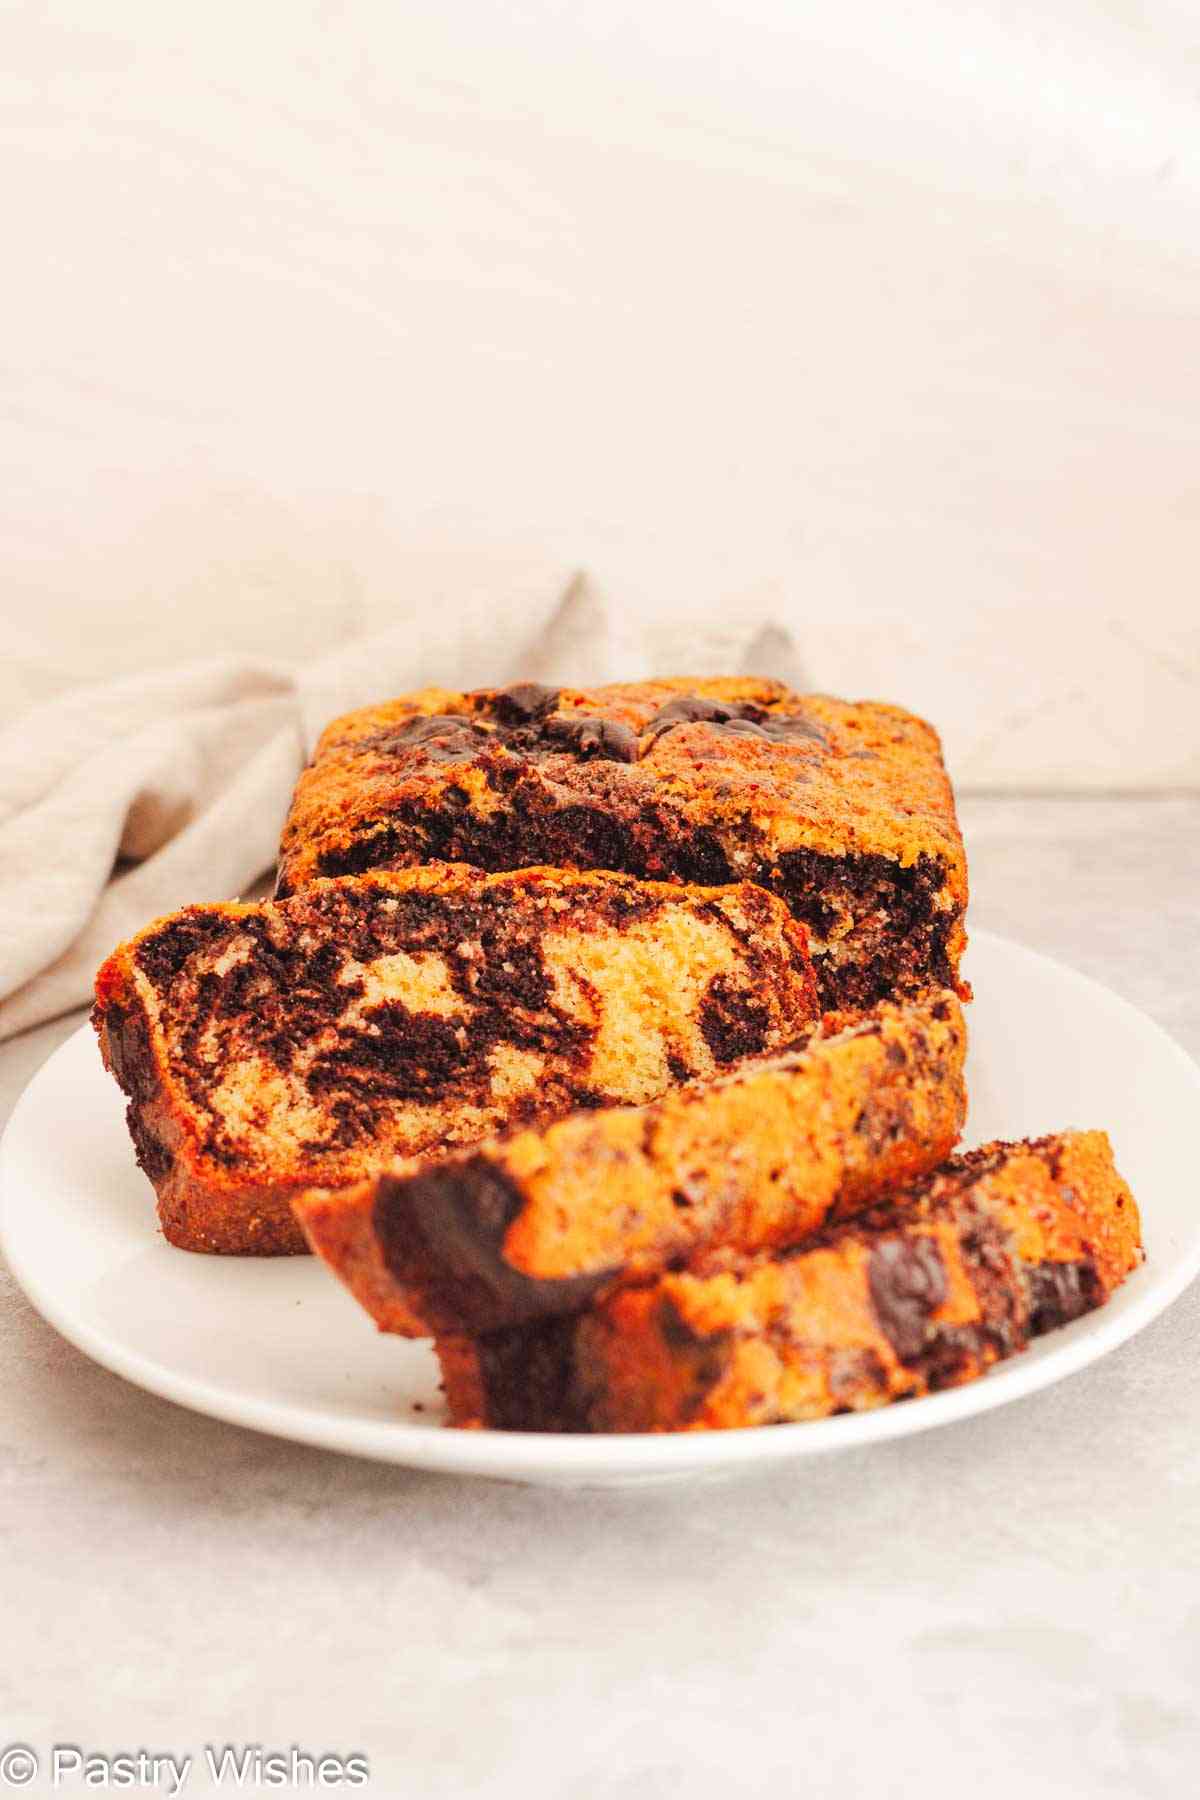
If you love the classic combination of chocolate and vanilla, this marble loaf cake is about to become a favorite. It's soft, buttery, and perfectly balanced, with defined swirls that look impressive but are surprisingly easy to achieve. Made completely from scratch, it's perfect for a coffee break or an easy dessert.
Quick Summary
This marble loaf cake is a soft vanilla loaf with a chocolate swirl made from cocoa powder. The batters are layered and then given one gentle zigzag swirl, so you get defined marbling without the chocolate taking over. It's an easy, from-scratch loaf cake that you'll want to bake again and again.

What is a Marble Loaf Cake?
A marble loaf cake (aka chocolate swirl loaf cake) is a soft vanilla cake with ribbons of chocolate swirled throughout. Instead of mixing the batters together completely, the vanilla and chocolate are layered and gently swirled so you get that classic marbled look when you slice into it. It's usually baked in a loaf pan, which makes it simple, cozy, and perfect for everyday baking. And every slice looks a little different, which is half the fun!
If you love chocolate and vanilla together, you might also enjoy my Chocolate Tiramisu Cake or my Classic Vanilla Cupcakes with Chocolate Frosting.
Jump to:
How to Get Perfect Swirls in a Marble Loaf Cake
Getting those pretty, defined swirls in a marble loaf cake isn't about aggressively mixing the batters together - it's actually the opposite. The key is starting with smaller portions of chocolate batter and slightly larger spoonfuls of vanilla. This keeps the chocolate from overpowering the loaf and helps the two batters stay distinct instead of blending into one brown cake.
Batter thickness also matters. If the batter is too thin, the chocolate spreads too much and the pattern disappears. A thicker batter holds its shape better, which means you'll see clear ribbons when you slice into the cake.
When it comes to swirling, less really is more. I've made this cake two different ways: by leaving the batter as-is after layering (it will naturally create its own marbled look as it bakes), or by making one or two slow zigzags with the back of a wooden spoon for more defined ribbons. Either way works, just don't keep swirling, or the vanilla and chocolate will blend together and you'll lose the marbled effect.
And here's a helpful visual cue: before the cake goes into the oven, you should still see clear patches of vanilla and chocolate on top. If everything already looks blended, it's been swirled too much.
Why I Love This Marble Loaf Cake
- Balanced flavor: You get both vanilla and chocolate in every bite, without the chocolate taking over.
- Pretty swirls without stress: The layering method makes it easy to get a marbled look (with or without a swirl).
- Soft, buttery texture: It bakes up moist and tender, not dry or dense.
- Everyday ingredients: You probably have most of what you need in your kitchen already.
- Perfect anytime: Great with coffee, tea, or for dessert.
Ingredients & Tips

Even though this recipe uses simple ingredients, a few small details make a big difference.
- Butter: Use real unsalted butter and make sure it's properly softened at room temperature. It helps create a light, fluffy base when creamed with the sugar.
- Sugar: Regular granulated sugar works best here. It keeps the crumb tender without making the cake too dense.
- Eggs: Bring the eggs to room temperature before mixing so that the batter is smooth.
- Buttermilk: Room-temperature buttermilk blends more smoothly into the batter. It adds moisture and keeps the cake soft. If you don't have buttermilk, you can use the simple substitute listed in the Variations & Substitutions section below.
- Cocoa Powder: Use unsweetened cocoa powder and mix it with hot water before adding it to the batter. This technique is called "blooming" and it deepens the chocolate flavor and helps it blend evenly without creating dry streaks. If you're not sure whether to use natural or Dutch-process cocoa, I explain the difference in detail in my post on Dutch-process vs. natural cocoa powder.
How to Make Homemade Buttermilk
To replace the ⅔ cup (160 ml) of buttermilk:
- Add 2 teaspoons lemon juice or white vinegar to a measuring cup.
- Pour in milk until it reaches ⅔ cup (160 ml).
- Stir and let it sit for about 5 minutes, until slightly thickened.
See the recipe card at the end of the post for quantities. 👇
Equipment you'll need
- mixing bowls
- hand mixer or stand mixer
- 9x5 inch loaf pan
- parchment paper
How to Make Marble Loaf Cake (Step-by-Step)
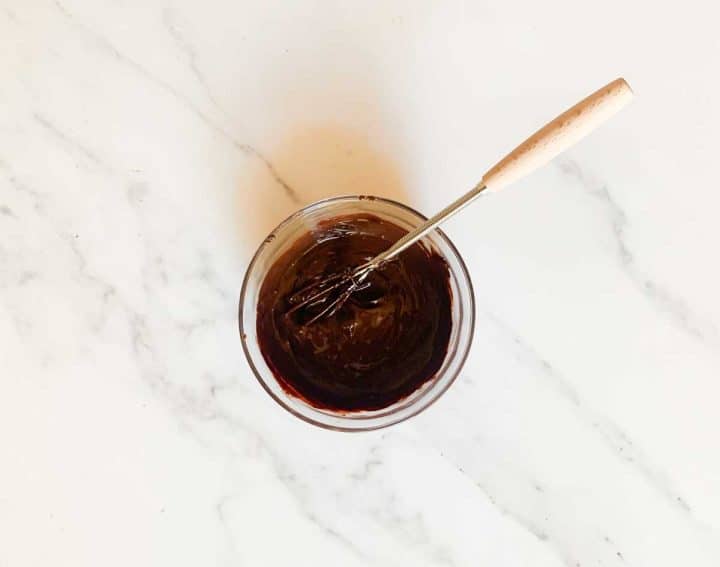
Step 1: Mix the Cocoa Paste
Whisk the cocoa powder and hot water together until smooth and paste-like. Set aside to cool.

Step 2: Whisk the dry ingredients
In a medium bowl, whisk together the flour, baking powder, baking soda, and salt.

Step 3: Cream the Butter and Sugar
Beat the butter and sugar until light and fluffy, about 3-4 minutes.
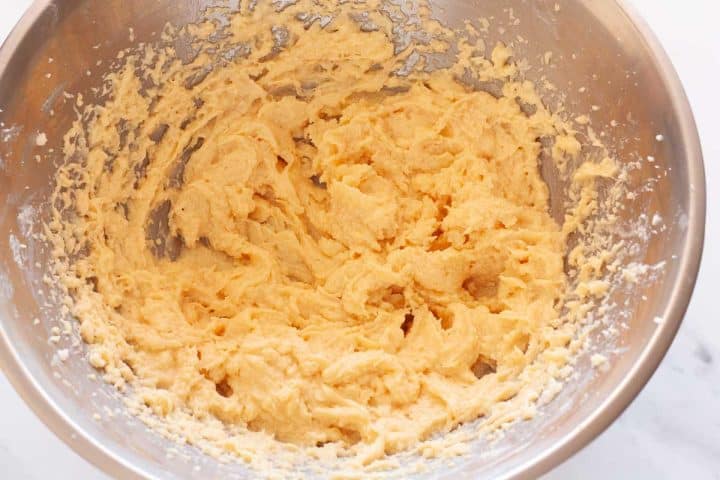
Step 4: Add the Eggs and Vanilla
Mix in the eggs one at a time, then stir in the vanilla until combined.

Step 5: Alternate Dry Ingredients and Buttermilk
Add half the dry ingredients, then half the buttermilk. Repeat and mix just until combined.

Step 6: Make the Chocolate Batter
Transfer about ¾ cup of batter to a small bowl, then mix in the cooled cocoa paste until smooth.

Step 7: Start Layering the Batters
Spread a thin layer of vanilla batter over the bottom of the prepared pan, then add small chocolate dollops (about half a tablespoon each), spacing them out.
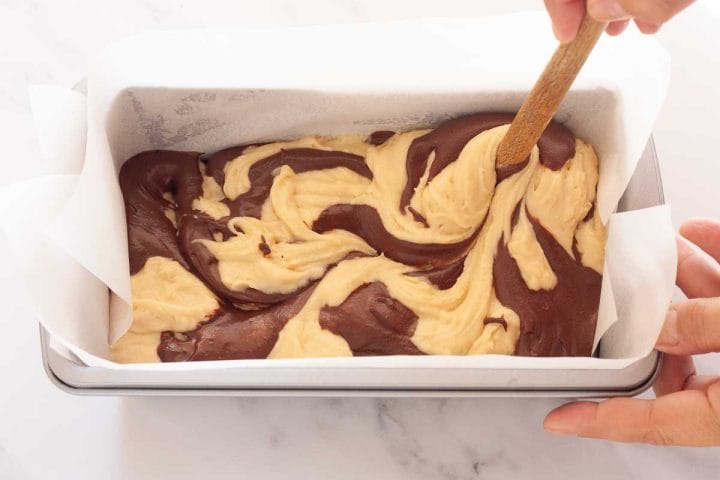
Step 8: Finish Layering and Swirl
Continue alternating vanilla and chocolate dollops until all the batter is used. Then, leave as-is for a natural marble, or use the back of a wooden spoon to make one to two gentle zigzags through the batter.
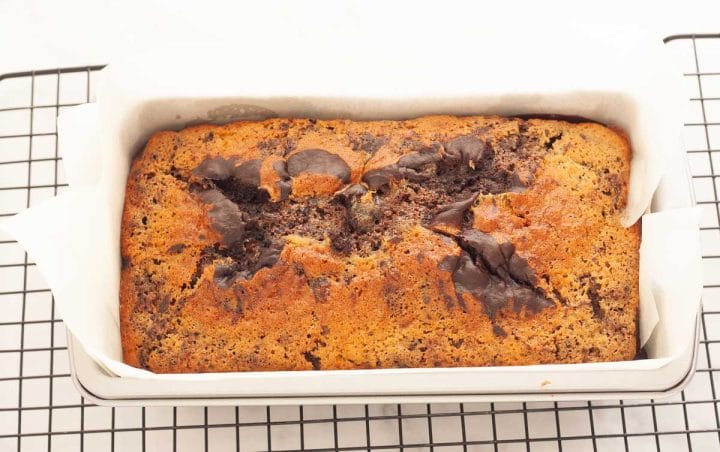
Step 9: Bake and Cool
Bake until golden and a toothpick comes out clean.

Variations & Substitutions
- Use melted dark chocolate instead of cocoa powder. You can replace the cocoa mixture with melted and cooled dark chocolate for a deeper chocolate flavor. The texture will be a bit denser, but still delicious.
- Skip the swirl altogether. Prefer a more natural look? Simply layer the vanilla and chocolate batters and bake without swirling. The cake will create its own pattern as it bakes.
- Add a chocolate boost. Stir a small handful of chocolate chips into the chocolate batter for extra chocolate pockets throughout the loaf or top it with chocolate ganache.
- Keep it simple. This marble loaf cake is perfect on its own, but a light dusting of powdered sugar makes it pretty.
Tips for Success
- Weigh your ingredients. A digital scale gives the most consistent results.
- Use room-temperature ingredients. Softened butter, room-temperature eggs and buttermilk blend together smoothly and give the cake a better texture.
- Let the cocoa mixture cool first. If it's still hot when you add it to the batter, it can thin the chocolate portion and make the marbling less defined.
- Don't overmix the batter. Once you add the flour, mix just until combined. Overmixing can make the cake dense.
- Keep the chocolate dollops smaller. Using small chocolate dollops (about half a tablespoon each) helps the swirls look defined and keeps the chocolate from taking over.
- Swirling. Swirl once or twice with the back of a wooden spoon or a wooden skewer, making slow zigzags. Overswirling will blend the batters and you'll lose that pretty marble look.
- Prevent over-browning: If the top is getting too dark, loosely tent the loaf with aluminum foil after about 30 minutes of baking.
- Cool completely before slicing. I know it's tempting, but the swirls (and the crumb) look much nicer once the cake has fully cooled.
Storage Tips & Freezing Instructions
Keep the cake tightly covered at room temperature for up to 3 days, or refrigerate it for up to 1 week.
This cake freezes really well. Let it cool completely and freeze it for up to 3 months. Wrap it well in plastic wrap, then place it in a freezer bag or freezer-safe container. I usually wrap individual slices. Then thaw overnight in the fridge.
Frequently Asked Questions
Marble loaf cake tastes like the perfect balance of vanilla and chocolate in each scrumptious slice. The vanilla portion is soft and buttery, while the chocolate adds a light cocoa richness without being overpowering. Because the batters are swirled together, each bite gives you a swirl of both flavors. It's comforting, classic, and not too sweet.
This usually happens when there's too much chocolate batter or the cake was over-swirled. If the batters are mixed together too much, the vanilla and chocolate blend instead of staying distinct. Using smaller dollops of chocolate and making just one or two gentle zigzags helps keep the marbled pattern clear.
Yes. If you don't have buttermilk, you can make a quick substitute by adding 1 tablespoon of lemon juice or white vinegar to a measuring cup, then filling it with milk until it reaches 1 cup. Let it sit for about 5 minutes before using. The cake will still turn out great.
Related recipes


Happy Baking!
Did you make this recipe? If so, please let me know how it turned out and leave a rating and review below! I'd love to hear from you! ❤️
Recipe

Easy Marble Loaf Cake
Equipment
- 9x5-inch (23X13 cm) loaf pan
- parchment paper
- wooden spoon
- hand mixer (or stand mixer)
- whisk
- mixing bowls
Ingredients
- ¼ cup unsweetened cocoa powder (21g)
- 3 tablespoons hot water (45 ml)
- 1¾ cups all-purpose flour (220 g)
- ½ tablespoon baking powder
- ½ teaspoon baking soda
- ¼ teaspoon salt
- ¾ cup unsalted butter at room temperature (170 g)
- 1 cup granulated sugar (200 g)
- 2 large eggs at room temperature
- 2½ teaspoons pure vanilla extract (10 ml)
- ⅔ cup buttermilk at room temperature (160 ml; or make your own, see Notes below)
Before You Start:
For best results, please read through the full post before beginning the recipe.
Instructions
- Preheat the oven to 350°F (180°C). Lightly grease a 9×5-inch (23X13 cm) loaf pan and line it with parchment paper, leaving some overhang for easy removal.
- In a small bowl, whisk together the cocoa powder and hot water until smooth and paste-like. Set aside to cool while you make the batter.¼ cup unsweetened cocoa powder, 3 tablespoons hot water
- In a medium bowl, whisk the flour, baking powder, baking soda, and salt. Set aside.1¾ cups all-purpose flour, ½ tablespoon baking powder, ½ teaspoon baking soda, ¼ teaspoon salt
- In a large bowl, beat the butter and sugar with a hand mixer (or stand mixer) until light and fluffy, about 3-4 minutes.¾ cup unsalted butter at room temperature, 1 cup granulated sugar
- Add the eggs one at a time, mixing well after each addition. Scrape down the bowl as needed, then mix in the vanilla.2 large eggs at room temperature, 2½ teaspoons pure vanilla extract
- Add half the flour mixture, then half the buttermilk, mixing on low speed until combined. Repeat with the remaining dry ingredients and buttermilk. Mix just until combined, but do not overmix.⅔ cup buttermilk at room temperature
- Transfer about ¾ cup of the vanilla batter to a small bowl. It doesn't have to be exact.
Assemble the cake
- Add the cooled cocoa mixture to the reserved vanilla batter and mix until smooth and fully combined.
- Spread a thin, even layer of vanilla batter over the bottom of the prepared loaf pan.
- Using a regular tablespoon, drop small dollops of chocolate batter (about half a tablespoon each) over the vanilla layer, spacing them out in a loose checkerboard pattern. Smaller chocolate dollops help create a more balanced, well-defined marbled pattern.
- Spoon larger dollops of vanilla batter (about 1 tablespoon) over and between the chocolate dollops, gently covering them without spreading or mixing.
- Continue alternating small chocolate dollops and larger vanilla spoonfuls until all the batter is used. Gently shake the pan to help the batter settle evenly.
Swirl options (choose one):
- No swirl: Leave the batter as is. The cake will naturally form a marbled pattern as it bakes.
- One or two swirls: For more defined ribbons, use the back of a wooden spoon to make 1-2 slow zigzags through the batter from one end of the pan to the other, moving gently left and right. Don't over-swirl, or the batters will blend together instead of forming a marbled pattern.
- Bake for 60-70 minutes, or until a toothpick inserted into the center comes out clean. After the first 30 minutes, top loosely with foil to prevent browning.
- When the cake is done, let it cool in the pan for 15-20 minutes, then lift it out and transfer it to a wire rack to cool completely
- Slice and enjoy!
Thanks for stopping by! Let me know what you think: